Tuesday, March 31, 2009

Intel releases Nehalem

Yesterday Intel unveiled the Xeon 5500 chip, which is the server version of the chip codenamed Nehalem. According to Intel, this new chip will have 9 times the performance of the previous chip. It also includes great virtualization-friendly features such as Quickpath interconnect (supposedly 4 times the memory access bandwidth of the Front Side Bus), 10 GigE NICs on board and new virtualization-specific instruction set.

Does this sound like at least quadrupling the # of VM's one can run on a box?? I think it is an awesome development that will help spread the virtualization revolution. According to Intel, by the end of this year this chip will come with 8 cores. Just for the fun of it... One will be able to build a system with 4 sockets, 8 cores each making a 32-core system. Each core should be able to run 7-10 desktop machines... WOW this would potentially mean awesome consolidation of 300+ desktops on a single piece of hardware. Mind boggling. I think the ROI of VDI is going to get pretty attractive.

Btw - here is a great VMware article on the benefits of Intel Xeon 5500 hardware assist technologies as utilized by ESX: http://www.vmware.com/pdf/Perf_ESX_Intel-EPT-eval.pdf

Monday, March 30, 2009

ThinApp Part I - Introduction / easy app example

VMware ThinApp is a pretty powerful addition to any VDI environment.
With VMware View VDI you can cut down the maintenance costs of your desktop environment pretty drastically, and provide a more manageable solution with many benefits to your business in the long run. However, the question of application delivery itself presents a challenge that VDI itself does not really address.  ThinApp fills that gap by virtualizing applications. In this post I would like to present how ThinApp works. I will also demo delivery of a single application (Adobe Reader). Stay tuned for a follow-up post tackling a more challenging situation.

ThinApp is part of the Premier edition of VMware View (along with Composer). In essence, it allows any application to be virtualized - i.e. delivered and run on any desktop (virtual or physical) without actually being installed. The process of making an application available (ThinApp'd) consists of the following:
  • An administrator prepares the application package ("thinapps" the app) by performing a typical install of an app on a desktop machine (virtual or physical).  In the background, while the application is being installed, the ThinApp process records any changes and additions the app setup makes to the OS.
  • These changes (the recording) are then "packaged" into an executable file. That file contains all the files, settings, registry settings, etc., that the app needs to run.
  • The administrator then places that package (the executable) on the network - somewhere where it can be accessed by the intended users of that application
  • The end user can browse to that executable and launch it. When it is launched, the application streams to the end user's machine, starts up and behaves as if it was actually installed. 
  • However, the application is never installed - it runs in a "virtual bubble" - which eliminates any application conflicts and removes the effort/challenges typically associated with the addition and removal of applications (the application lifecycle). The application can run on any system for any user.
In this demo, I will thinapp Adobe Acrobat Reader 9.1.

I have two WindowsXP virtual machines in my lab. They are both "fresh" - no software has been installed on them other then what typically comes with WinXP. The first machine (Packager) will be used to prepare the thinapp application packages. The second machine will be the end-user computer that the thinapp'ed Acrobat Reader will be delivered to and launched.

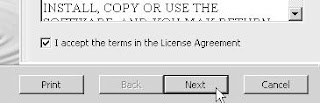
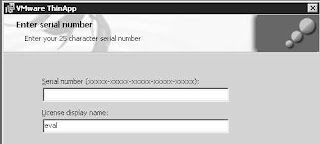
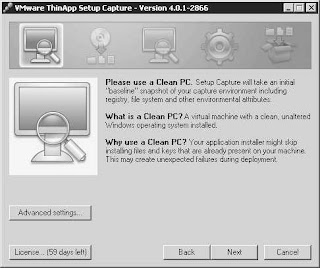
Before I can package an application, I need to install ThinApp recording engine. ThinApp itself is tiny - about 10 MB. I created a snapshot on my packager vm before I kicked off the ThinApp install. The install itself is super simple. Just kick it off and supply the license number:


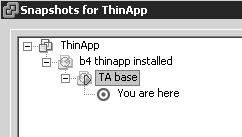
Once ThinApp is installed, I immediately create another snapshot. That new snapshot will be the "base" I will always revert to before packaging (thinapping) an app so that I always have a "clean" OS to build a package on:


I called the "base" snapshot "TA base"

It is important to start with such "clean" image because some application setups will not install files that are already present and thus will not be captured by ThinApp recorder. Once users attempt to stream such app, it will fail because their base OS may not have these files on it.

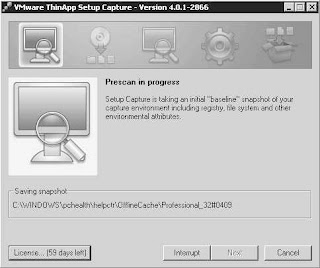
Now I am ready to package Acrobat Reader. I start the ThinApp recorder:


After hitting Next it scans the vm to record its state before Adobe Reader is installed:

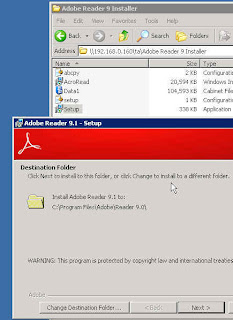
Now I am going to minimize ThinApp and install Acrobat Reader:


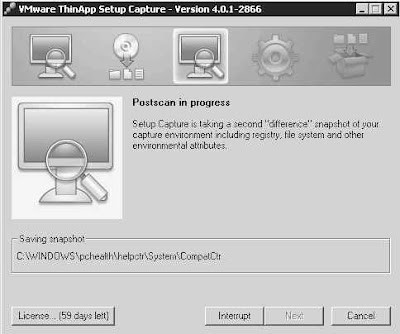
The install is now done. I can maximize the ThinApp window and click Next to have it re-scan the vm to detect and record all the changes and additions done by Acrobat setup (One other thing I did before re-scanning is I launched the Reader to accept the Adobe EULA and change Acrobat properties to Never check for Updates - so that the end users are not annoyed by any popups. The changes I made will be recorded as part of the package):


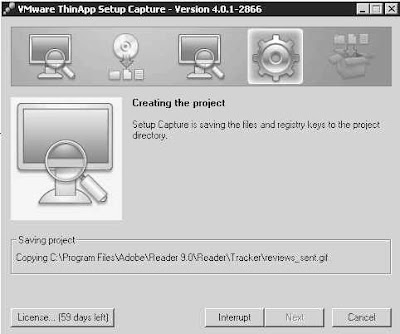
Once the Rescan is complete, I tell ThinApp what executables in the package are to be "launchable":


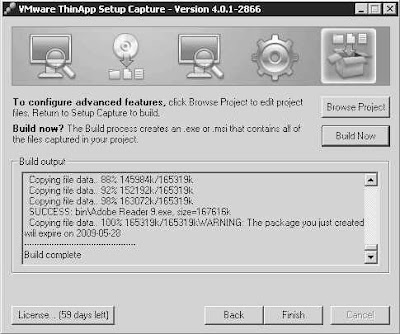
Now I am ready to tell ThinApp to Build the package (actually, there were three other screens with options I did not include/explain on purpose - they will be covered in another "advanced knowledge" post in the ThinApp series):


I can now launch the packaged Adobe Reader from my test workstation (on which Adobe was never installed) and experience the delivery of a ThinApp'd application. Note that I have a pdf document saved on my desktop. The document type (pdf) is not recognized by the OS and tso the icon is missing:

On that workstation, I am going to execute the following command:
  • c:\thinreg.exe "\\192.168.0.160\ta\Adobe Reader 9.exe"
thinreg is a Command-Line utility that registers the package and any associated file associations. It gets installed with ThinApp. In a production environment, the registration using thinreg.exe would be done as part of a logon script or similar automatic mechanism.

Once I register Adobe Reader, its shortcut appears on the desktop. Also, the pdf file now has the proper icon (registration of the package was successful):


I can now double-click the pdf file (in this example, the VMware View Admin Guide), and it launches right away with Adobe Reader. Above the system tray there is a momentary pop-up informing about the Reader being launched:

It is followed by Adobe Reader launching with the document I double-clicked on:


Now I can use this procedure to make Adobe Reader available to any of my users.

Stay tuned for ThinApp article Part II - more advanced management and applications.

Friday, March 27, 2009

Homemade ISO storage using Linux-based NAS server

A month ago or so I started to run out of space on my ESX lab server. A quick look at the Datastore revealed that about 80 Gb was used for ISO images (I admit making the mistake of using my VMFS to store the ISOs...). I had to free that space somehow. I decided to re-purpose older desktop hardware that was languishing in my basement and build a NAS server. That old desktop had a 60 Gb harddrive in it and it would work perfectly as ISO storage.

I downloaded UBUNTU Server 8.1 and instaled it on the old hardware. The installation went without a hitch.  Once the installation completed, I installed the NFS server by the following command (logged in as root): 
  • apt-get install nfs-kernel-server nfs-common portmap
That command downloads the NFS server package and then installs it.
After that, I created my ISO file share using the following command:
  • mkdir /ISO
Then, I edited the exports file. The exports file tells the NFS server which directories to make available to the NFS clients (i.e. my ESX server), along with any options. I only added one line:

  • \ISO is my file share
  • 192.168.0.1/24 specifies that only clients on this subnet will be able to access the file share
  •  “no_root_squash” allows the VirtualCenter read/write access to the volume
I saved the file and restarted the NFS server:
  • /etc/init.d/nfs-kernel-server restart:

I then went to my Virtual Center and added this file share to the list of my Storage. I called the new Storage NAS-ISOs:


Now, that NAS fileshare appears in the list of my Storage and is ready to use:


I can now copy all my ISO's to that fileshare and free the space on my VMFS partition.

Can VMware View Security Server accept connections without a certificate over port 80?

Yesterday a customer asked me a question: Can we use View Security Server (as a singular IP access point to ther VDI environement) without the need to buy a certificate?

The answer is Yes.

What is their business need?
  • they already have a VPN (so no need to use the Security Server to encrypt the connections)
  • However, they would still need to open ACL's on their VPN to allow the end user access to the virtual desktops
  • View Security Server would work great as they would only need to open ACL's from their clients to one IP address. 
They can do that, and still use http (port 80) only (without the need to buy a cert), with a very simple proxedure: make the following changes to their locked.properties file located under C:\Program Files\VMware\VMware View\Server\sslgateway\conf:
(note the lines starting with client and server)

They need to reboot the server (or restart the View Security Server service) for these changes to take effect.

Virtualization and SMB's

Just a quick note... Last night while I was relaxing on the couch half-paying attention to one of my wife's favourite shows, I thought about a few SMB's I had visited in the last few weeks on projects not directly related to VMware. I saw 3 or 4 customers who I thought would benefit from implementing virtualization. I talked to them about VMware and in many cases they were a little oblivious to the value it would offer them. I think more education needs to take place in the SMB market space to increase the SMB's awareness of virtualization. 

There is definitely a big untapped potential there... Case in point: three of the four customers implemented 32-bit Windows systems on server hardware with 8 GB RAM and8 CPU cores. These servers will be hugely underutilized and could potentially support upwards of 10 production loads (instead of just one :-(...). I shared my observation with them and was greeted by surprise and disbelief.

In two cases I connected remotely to my ESX lab and demoed deployment of two W2K3 servers using simple (yet mostly uknown...) time-saving techniques such as ISO images, Linux NAS file libraries, etc - to show how much easier life is with virtualization. 

In two cases customers requested a follow up visit to present on the benefits of VMware :-) ...

Thursday, March 26, 2009

Setting up VMware View Lab - Making the Connection

Ok, now I am ready to test my Lab by connecting to my virtual desktops over the Internet. (See the previous post for the virtual desktop pools setup).

to imitate an end-user environement, I spun up a fresh WinXP in the VMware Workstation on my laptop. AMAZINGLY, this workstation does not need anything added to or installed on it to be able to take advantage of the VMware View virtual desktops.

Well, that's not exactly the case... because my lab's FQDN is not oficially registered on the Internet, I had to create a host entry in the HOSTS file on the virtual WinXP that points to the IP address of my Bell Sympatico connection and matches that with the FQDN of my Security Server view.esxlab.local (but this would not be necesary in a real-world scenario).

Now, all I need to do is point my Internet Browser to the FQDN of my View Lab:


Provide the credentials: 


Now, this is super cool... Every PC needs a VMware View client to be able to connect to a virtual desktop. However, the View client is automagically delievered (if you don't already have it - it detects it) via a THINAPP package, and automatically installed on the end-user PC:


ThinApp is a super cool VMware technology - I am planning to cover it in a future post!

After accepting the Install request, I can now see my virtual desktops available to me:


I click on Windows 7 (Win7) and voila: the connection starts:

.....


Now, if I launch the WinXP desktop (so I am logged in to more than 1 desktop at the same time), I can switch between both desktops. What a cool idea - I can now test and work with the newest OS (Windows 7) while being able to go back to my existing desktop on Windows XP anytime:


Setting up VMware View Lab - virtual desktops

Ok, now I am ready to configure the virtual desktops. (See the previous post for the View Connection Server setup).

I want to be able to have both a Windows XP and Windows7 virtual desktop available to connect to. I decided to create an Automated, Persistent Pool for my WindowsXP and a static one-vm Collection with Windows7 Beta. Both will be available to my test user to connect to from the Internet:


For my WinXP desktop pool (here named LabDesktop), I instructed View to use an existing XP template I have in my Virtual Center when spinning up the new desktops, and to customize using one of my XP customization templates:


As far as Windows 7 Beta goes, I did not create an automated desktop pool. Instead, I just installed a virtual machine of Windows7 Beta 64-bit (the install went without a glitch by the way...). Then I added it to the domain, installed VMware Tools and View Agent 3.0.1. After that I added it as a target virtual desktop to my View environement:


Finally, I Entitled Domain Admins (my test user is a member of that group) to use both vdesktops:

In the next Post I am going to demonstrate how to connect to these two desktops from anywhere on the internet.

Setting up VMware View Lab - VMware View Security Server

Ok, now I need to install the View Security Server.
(See the previous post for the View Connection Server setup)

The Security Server is a proxy that channels the client connections to the View environment over a certificate-secured SSL protocol (TCP 443). The huge b
enefit of the Security Server is that only that server's IP address needs to be exposed t
o the Internet. All the client authentication and interaction happens over this gateway (is proxied), thus protecting the internal components of the envirtonment (inclusing the virtual desktop targets). here is a Visio of my setup:


The Security Server setup is very straight-forward. I spun up another W2K3Sp2 box with default settings (No IIS) and kicked off the install of View Security Server.

The install completed in a very short time. Once the install is done there are a few things that need to be done.

First, I neeed to generate a certificate. Certificate is needed for the Security Server to authenticate itself to the client. The certificate is bound to the FQDN of the Security Server. In my case it is view.esxlab.local. 
To obtain the certificate, I did the following:
  • Generated the secure key by runnning the command "keytool -genkey -keyalg "RSA" -keystore keys.p12 -storetype pkcs12 -validity 360" on the Security Server
  • Generated the CSR by running the command "keytool -certreq -keyalg "RSA" -file certificate.csr -keystore keys.p12 -storetype pkcs12 -storepass PASSWORD  on the Security Server
  • Submited the resulting CSR to a Micrsoft Certificate Server running on another virtual machine in my lab. IMPORTANT: you must use the Certificate Chain otherwise the Security Server will not acept the certificate:
  • Saved the cert (I named it MyCertName) on the Security Server and loaded it with the command: " keytool -import -keystore keys.p12 -storetype pkcs12 -storepass PASSWORD -keyalg "RSA" -trustcacerts -file MyCertName.p7
  • Copied both the cert and the key under C:\Program Files\VMware\VMware View\Server\sslgateway\conf
Next, I needed to generate the security server properties file - it is done from the View Connection Server:
The resulting file is called config.properties BUT needs to be renamed to locked.properties and copied to the Security Server under C:\Program Files\VMware\VMware View\Server\sslgateway\conf

Once you copy the file, open it and add two variables:
  • clientHost=view.esxlab.local (or whatever your FQDN is. It must match the FQDN of your certificate)
  • keyfile=keys.p12
  • keypass=PASSWORD (or whatever password you chose)
Now you need to restart the Security Server for the new configuration to be read.

As the next step in my Lab setup, I will create the target desktops. The procedure will be covered in the next Post.

Setting up VMware View Lab - VMware View Connection Server

I am now ready to deploy the VMware View Connection Server.
(See the previous post for the Foundation setup)

The setup of VMware View Connection Server 3.01 is pretty straight-forward. I spun up a fresh Windows 2003 machine with 8GB disk and 1024 MB RAM. Nothing special was added to this build (other than I removed all the IIS components as VMware View does not use IIS - it uses Apache). I addedd this server to my lab AD domain (ESXLAB.local), and then I installed Vmware View from the 3.01 eval media downloaded from Vmware.com:

After the installation was completed, I configured the Connection Server in the following manner:

My Virtual Center's IP address is 192.168.0.160:
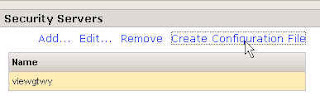
I also configured my VMware Connection Server to use a VMware Security Server, as follows:


More details on the Security Server in the next Post.

Monday, March 23, 2009

Setting up VMware View Lab - The Fundamentals

Hi,
In this post I'd like to describe how I set up a demo lab of VMware View 3.01 Virtual Desktop environment.

When my lab is finished, I would like to be able to demo connecting to WindowsXP and Windows7 (beta)  desktops over a secure Internet (WAN) connection from anywhere, using my laptop as the "client".  I would also like to show how a user can seamlessly "switch" between WindowsXP and Windows7 sessions "on the fly" to further demonstrate the power of VDI.

My Lab consists of the following:
  • ESX 3.5 upd.3 and Virtual Center 2.5 upd.4
  • For hardware I built a "whitebox" ESX server based on: 
CPU: INTEL Q6600 Quad-Core 2.40G
MOTHERBOARD: ASUS|P5BV-M 
MEMORY: 8 GB CORSAIR TWIN2X4096-6400C5 R
DISK: SATA SEAGATE HD 640G|ST 7K 32M ST3640323AS
(huge THANKS to Chad Sakac for his excellent 'whitebox' blogpost:
  • VMware View 3.01 Connection Server running on Windows 2003 SP2 (the Broker)
  • VMware View 3.01 Security Server running on Windows 2003 SP2 (the gateway that will proxy the connections from the client on the Internet to the virtual machines over SSL on port 443). This server is in my DMZ.
  • Two virtual machines (WindowsXP and Windows7 Beta)
My client is a WindowsXP virtual machine running inside VMware Workstation on my laptop.

The next Posts will explain the details of my Lab's configuration.